How to Epoxy a Garage Floor
What are the Benefits of Epoxy Garage Floors?
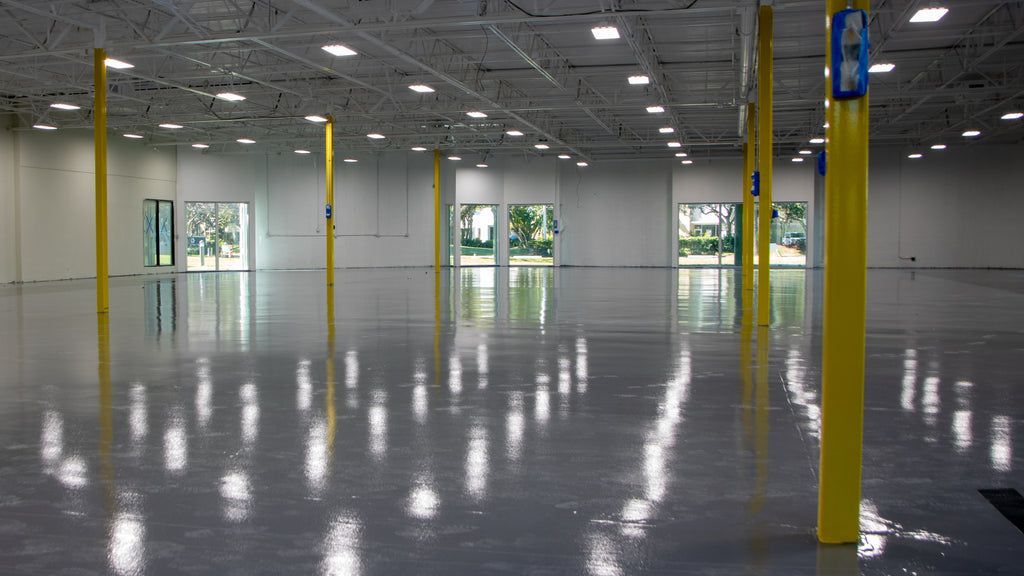
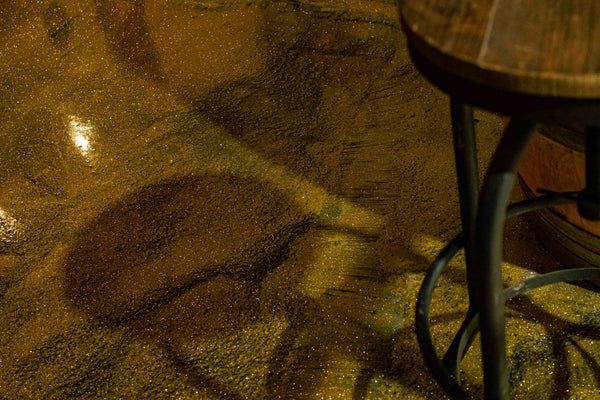
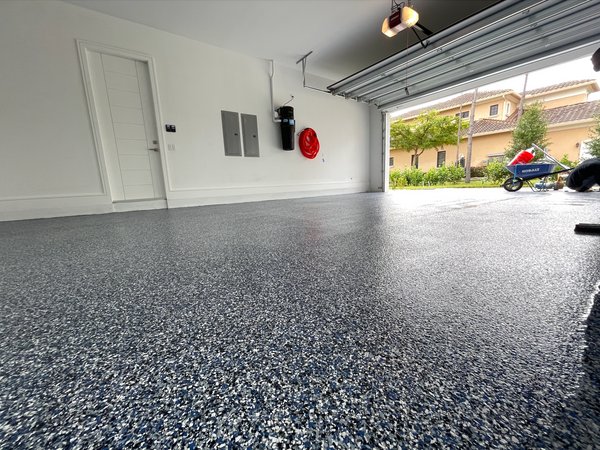
Your garage floor is worth the investment because epoxy not only gives a professional look but also resists oil stains, beads water, and wipes clean like a kitchen counter. An anti-slip additive helps you keep your footing on a rainy day, and color chips and custom paint colors hide concrete imperfections.
As you will see in the steps below, Xtreme Polishing Systems makes it easy for you to take your dirt out and apply the epoxy in just one weekend. Once that is done, the garage will be a space worth driving up to and showing off.
It Is Possible to Epoxy Your Own Garage Floor?
Epoxy applications are not difficult DIY projects and only require a weekend to complete. First, it is ideal to consider these things before beginning your project:
- Remove everything from your garage so the area is an open space.
- Use painter's tape and plastic to cover the lower wall areas around your project site.
- Rinse the floor with water using a hose.
- A bristle broom and a cleaning solution should be used to clean the floor.
- Make sure the garage floor has dried completely.
- Choose an epoxy coating of your choice and roll it on. Working in 10x10 sections is a good way to simplify this process for beginners.
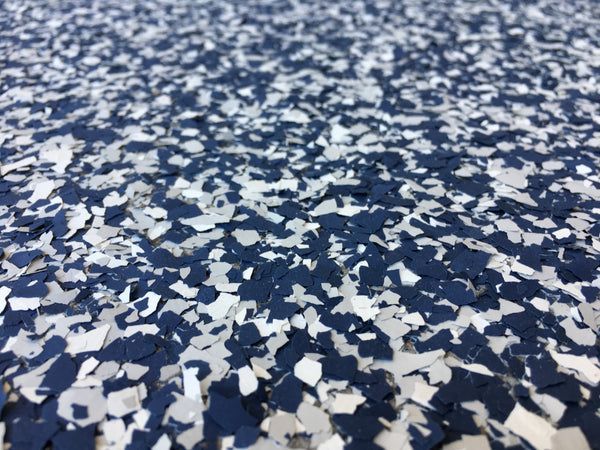
- Choose a color flake blend and broadcast it into the epoxy. For an even distribution, grab a handful of the colored flakes and toss them in the air as if you were feeding chickens.
- If there are excessive color flakes on the surface, scrape them off and vacuum them up.
- Finish the surface with a protective clear top coat.
Preparation of the Project Materials and Supplies
As with painting walls, the secret to applying an epoxy coating to a concrete floor is preparation. After the calculations, color selections, and cleaning are complete, the actual application should be relatively straightforward.
A perfectly smooth, slightly rough, and completely clean surface is necessary for the epoxy to bond properly. Before applying the epoxy coating, potholes and cracks should be repaired and given time to cure. Also. an epoxy coating must be applied to concrete that is at least 60 days old and not sealed. If the floor is sealed, you will need to remove it with floor grinder machine or a chemical stripper.
Furthermore, stripping a floor will not clean its surface. It is critical to thoroughly clean the surfaces before applying epoxy, as grease or dirt will compromise epoxy's adhesive properties and disrupt surface adhesion. Concrete cleaners come in different varieties from different manufacturers, so check out the ingredients before choosing one. There is a wide variety of chemical cleaners , ranging from harsh degreasers and etchers to safer but less effective organic options.
It is important to understand that certain types of epoxy coatings will not adhere properly to concrete once a chemical stripper is used on the surface. For this reason, our experts recommend grinding the surface with a concrete floor grinder to achieve the best finishing results. In general, you can rent a floor grinding machine from your local Home Depot or machine supply store.
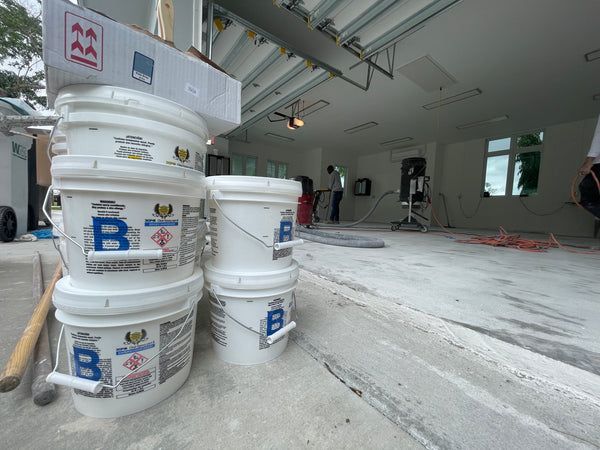
Epoxy coatings are usually packaged as kits that include everything you need. After selecting one, determine whether you need additional supplies. It may be necessary to apply additional coats of epoxy and topcoat in order to achieve even coverage. Standard epoxy kits , however, usually only provide enough for one coat, so additional epoxy kits may be needed. You will need to determine how heavily you will broadcast color flakes over the floor if you decide to use them to hide imperfections in the concrete. Having an adequate supply will ensure the success of the project.
It may also be a good idea to coat the vertical surfaces of your garage another few inches if the foundation rises above grade at the base of the walls. You will be able to clean your garage more easily this way. Decide if your application should be finished with anti-skid granules , which give the finished surface a sandpaper-like finish. If your region is prone to rain or ice, then this may be the best option.
As soon as the floor is clean and ready to be coated, timing is everything. Work on a day when conditions are dry and between 50 and 80 degrees to prevent bubbles and peeling of the application. Once you have mixed the epoxy resin and hardener, you will have about 45 minutes to an hour to work with the material. It is therefore necessary to plan how to coat your garage floor in advance.
Generally, experts recommend starting from the back corner and working outward. It usually takes 12 to 24 hours for the drying process to complete. Prior to parking the car on the floor, you will need to wait 72 hours for the floor to dry completely. Depending on the type of epoxy you purchase, the time variation may differ, so refer to the epoxy's technical data sheet before starting.
In the following 7-step guide, we will explain how to epoxy a garage floor from start to finish:
Step 1: Clear the Garage Space
Your first step should be to remove everything from your garage. You don't want to risk causing damage to your items, so pick a day when the weather is pleasant. Renting a storage pod or finding a temporary location for your garage items may be a good option if you have a lot of storage inside your garage.
Step 2: Clean and Prepare the Garage Floor
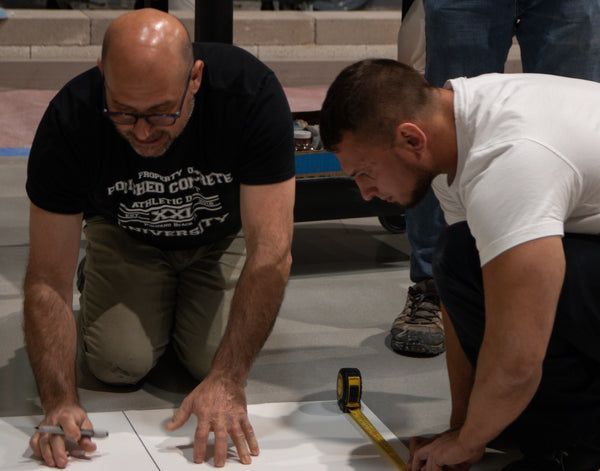
Apply painter's tape along the foundation edge or at the height where the epoxy will be applied to the walls to hold plastic sheeting against the walls. Remove dust and dirt from the floor by thoroughly sweeping it. Take out dust from corners and seams with an old paintbrush. Try sticking a strip of duct tape on the floor, then peeling it away to check if it's clean. The floor should be cleaned again if there is any dust or particles on the tape.
Scuff up existing paint residue on your garage floors by using a floor maintenance machine with a light-sanding pad . Dust that accumulates during this process should be swept or vacuumed away. After that, use an all-purpose cleaner to scrub the surface using a bristle broom. Ensure that the floor is thoroughly rinsed and allowed to dry for at least four hours. Next, proceed to Step 2.
Step 3: Prep the Surface with a Floor Grinding Machine
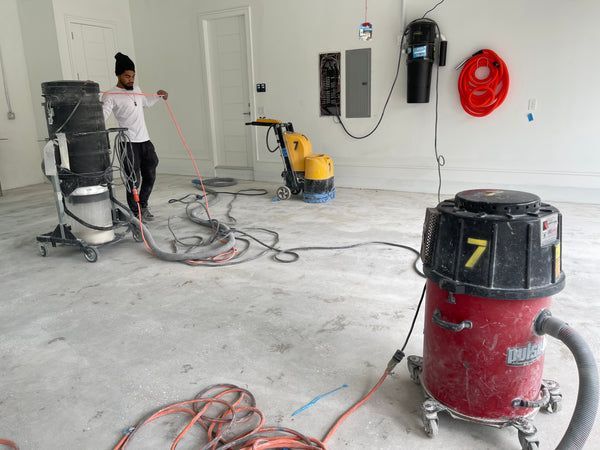
When preparing concrete floors for finishing, use a multi-surface floor surface grinder to grind and edge. Concrete flooring can be repaired, renovated, and ground away using these machines. Units like these are designed for industrial, commercial, and residential environments to meet the highest standards available.
For residential and commercial garage floors, Xtreme Polishing Systems offers single-phase 220V floor grinding machines . It is possible to connect these machines to a washer/dryer outlet. In addition to being powerful and easy to use, single-phase floor grinders are suitable for industrial, commercial, and residential contractors. By using our grinding discs , you can change or assemble tools easily and quickly. With a light push, the tools are inserted into custom cuts with a simple touch.
Get expert assistance with grinding garage concrete floors and choosing the right grinding tools by contacting our experts .
Step 4: Mixing the Epoxy Coating
Epoxy kits consist of resin and hardener packaged in individual containers. To begin mixing, open all of the epoxy containers. According to the product label and technical data sheet, combine the hardener with the epoxy resin and apply it directly to your garage floor surfaces. When using epoxy pigments for decorative applications, you should combine them with the epoxy mixture before applying it to the surface.
Ensure that the components are thoroughly blended by stirring for 3 minutes. It is recommended to use an automatic mixing device, however, mixing sticks are suitable if they are used correctly.
Step 5: Apply the Epoxy
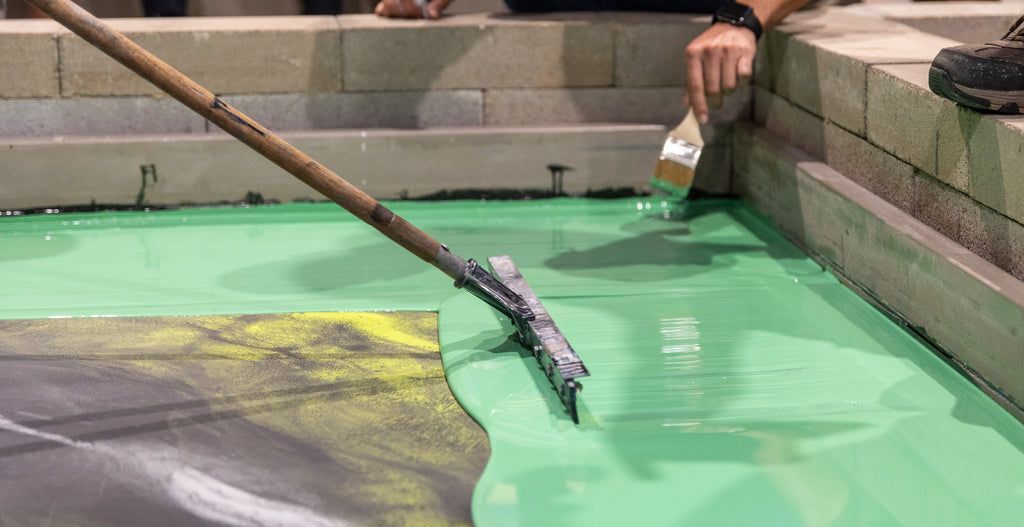
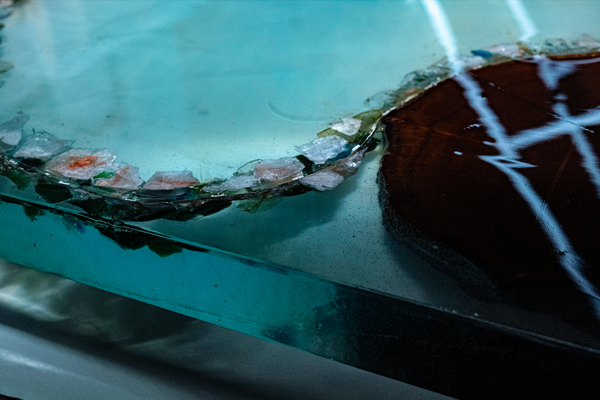
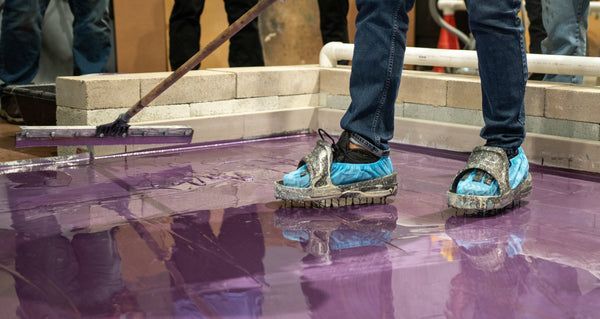
After mixing the epoxy formula, it needs to be applied as quickly as possible to allow it to cure properly. While working in the garage, ensure that it is well-ventilated. The epoxy should be poured into a roller tray lined with a liner. Make sure all borders and corners are well coated with epoxy using a 3-inch paintbrush . Go to the corner that is the furthest from the exit. Apply epoxy paint to a 10-by-10-foot section with a 3/8-inch-nap roller fitted with an extension handle. As compared to ordinary house paint, epoxy should feel thicker and stickier. Once again, feather out uneven lines by rewetting the roller and running it perpendicularly over the section. Cover each section of the floor one by one. When applying two coats, complete the entire floor, allow it to dry for 12 to 24 hours, then recoat it as needed. You can avoid clear seams when the epoxy is drying by keeping a wet edge as you move from section to section.
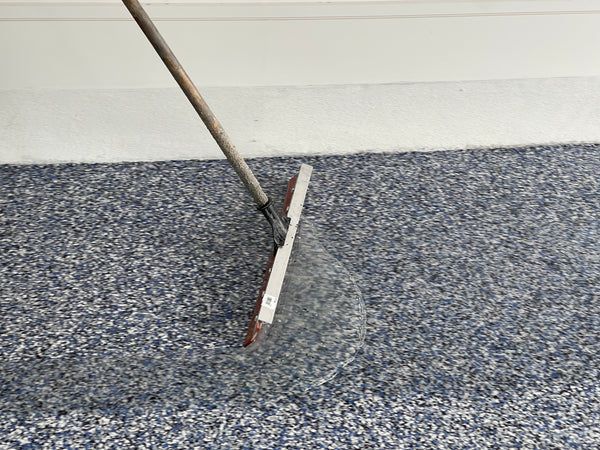
Step 6: Apply the Color Flakes
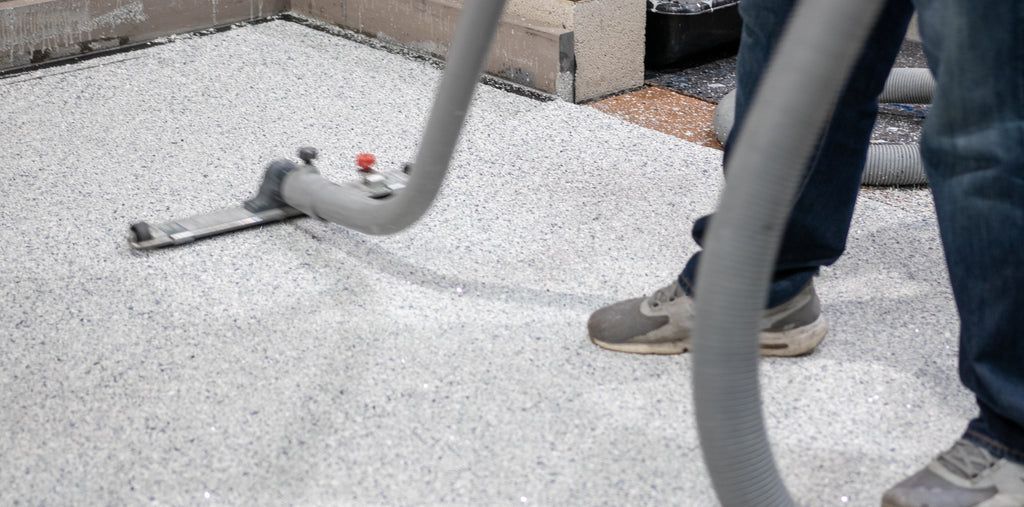
The color flakes should be applied while the area is still wet before you apply the finish topcoat. The flakes should be dispersed as evenly as possible by grabbing handfuls and throwing them like chicken feed. By doing so, the color flakes can be evenly dispersed throughout the application. Alternatively, you could shake a handful through your fingers like you would when scattering grass seeds. Although many companies package their flakes in cans with shaker tops to apply them, broadcasting them by hand may be more effective. Practicing on a tarp outside will help you refine your technique. Work your way from the back to the front of the garage just like you did when rolling on the epoxy. Scrape off any remaining color flakes and vacuum them up once the flakes have settled. Once the coating is applied, it is best to allow the entire floor to dry for 12 to 24 hours (longer in humid or cold weather).
Step 7: Apply the Topcoat

Make sure the material is applied to the corners, edges, and seams using a clean paintbrush. Apply the clear top coat in 10-by-10-foot sections, starting at a point farthest from the exit and rolling it on with a 3/8-inch-nap roller. Working in one direction first, then perpendicularly, cover each section until the entire floor has been covered. It is recommended that foot traffic waits at least 24 hours and automobiles wait at least 72 hours before parking. If it is humid or cold, it may take longer.